1
/
of
6
Jorkar
External SSD Enclosure for MacBook Air/Pro 12+16 PIN SSD, Hard Drive Reader for A1466 A1465 A1502 A1398 SSD mid 2013-2017, Portable Mac SSD to USB-C 3.2 Adapter Case (No SSD)
External SSD Enclosure for MacBook Air/Pro 12+16 PIN SSD, Hard Drive Reader for A1466 A1465 A1502 A1398 SSD mid 2013-2017, Portable Mac SSD to USB-C 3.2 Adapter Case (No SSD)
Regular price
$93.75 USD
Regular price
Sale price
$93.75 USD
Shipping calculated at checkout.
Quantity
Couldn't load pickup availability
Overview
- Hard Disk Interface : Solid State
- Connectivity Technology : USB
- Brand : Jorkar
- Special Feature : USB 3.2 20Gbps
- Hard Disk Form Factor : 2.5 Inches
- Hard Disk Description : Solid State Drive Enclosure
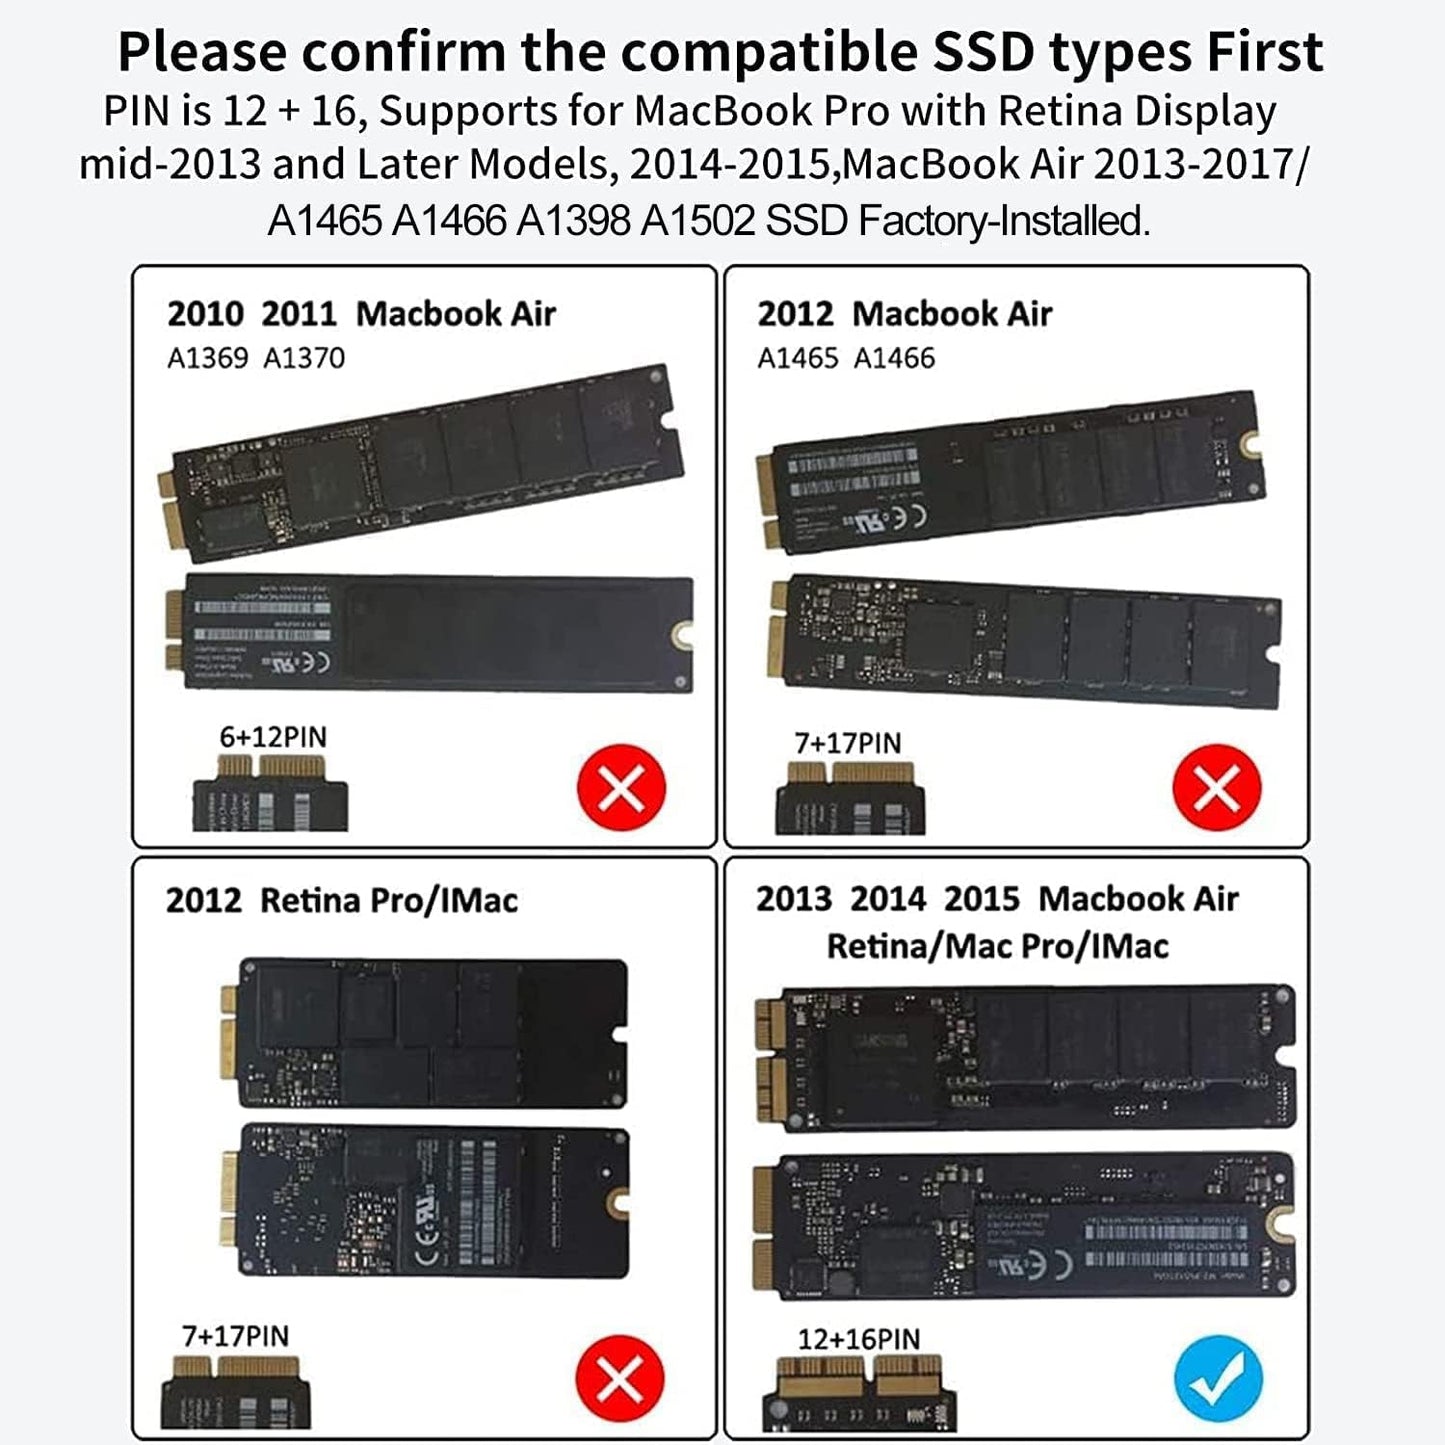
- Compatible Devices : MacBook Air/Pro SSD 12+16 pin A1466, A1465, A1502, A1398 (mid 2013-2017)
- Installation Type : External Hard Drive
- Color : For-Macbook
- Hard Disk Rotational Speed : 2200
About this item
- Jorkar USB C 3.2 SSD enclosure works for Mac SSDs with 12+16 Pins mid 2013-2017 MacBook Air/pro as list in description. Please check if your ssd is the one supported before order (important).
- SSD not included, just enclosure. NOT compatible with all SATA SSDs, or third-party SSDs. The SSD should be formatted first if you want to use it on Windows OS.On Windows OS, hard disk will not available on "This PC"/ "My computer", please find your drive from "Disk Management".
- Jorkar USB C 3.2 SSD enclosure Support up to 20Gbps transmission speed with USB 3.2 Gen2 interface if your SSD & the computer Both supports 20Gbps. Or just 10Gbps, 5Gbps according to your ssd and your computer.
- Jorkar 12+16 Pin SSD enclosure is sturdy and portable, with aluminum alloy case for quicker heat dissipation. To prevent it from being disconnected from your Mac or PC, we advise you to deselect “Put hard disks to sleep when possible” both in Battery and Power Adapter.
- Easy Installation,Just take out the PCB board from the enclosure, then fully insert SSD to card slot and screw it, then put PCB back into the enclosure and tighten the screws.
Share